Friday, November 24, 2006

Bean Me Up Scottie

Nowadays, we are always looking for better ways to eat. May it be for health reasons or just to take ourselves out boredom from eating the same thing. Let me shine the light on the mostly snubbed treat that packs a whallop of protien with fraction of the fat. By that, I am pertaining to "Beans". They are economical as well as tasty. Why do we not have them in our meals more often? My theory would be because there is a slight catch that comes along with these yummies. A sort of disclaimer that might say, eat at your own risk to your social life. Let's face it, they can give you bad gas. This can range from silent to musical and unscented to extremely scented. Nice way to determine who your real friends are though.

Why do they cause gas? Well, it's not their fault actually. It would be more on our lack a certain enzyme that would break down the sugar from beans called "oligosaccharides". That is why when these sugars pass down our digestive tract our natural bacterias that happily reside in our intestinal realty have a feast whenever they see these sugars. Of course, after their feast they loosen up their belts, slouch on their couch and have a belching contest. Well, as you are having a bleching contest without your knowledge going on, those released gases are having a time of their life meeting up with whatever sulfur you have passing through your intestinal town. The more blech that are released by these bacterias, imminent pressure builds up. Like any other party, as it gets crowded, you have to get out and have some air. That is when you get to release the pent up pressure going on in your tummy. If those gases got to pair up with some passing sulfur in your intestine, you will surely know about it.

There are some ways that can help in reducing the chances of bean induced music from happening. Soak your beans overnight and change the soaking water twice. Rinse off the beans prior to cooking and use fresh water for cooking. As foam rises up during cooking, skim off the foam from the pot. If you are not used to eating beans, it would be best if you start off with small quantities. There are those little magic pills called "beano" that you take prior to enjoying your beans. These pills would have the necessary enzymes that would be needed to chop down those big sugar molecules to smaller manageble sugar molecules.

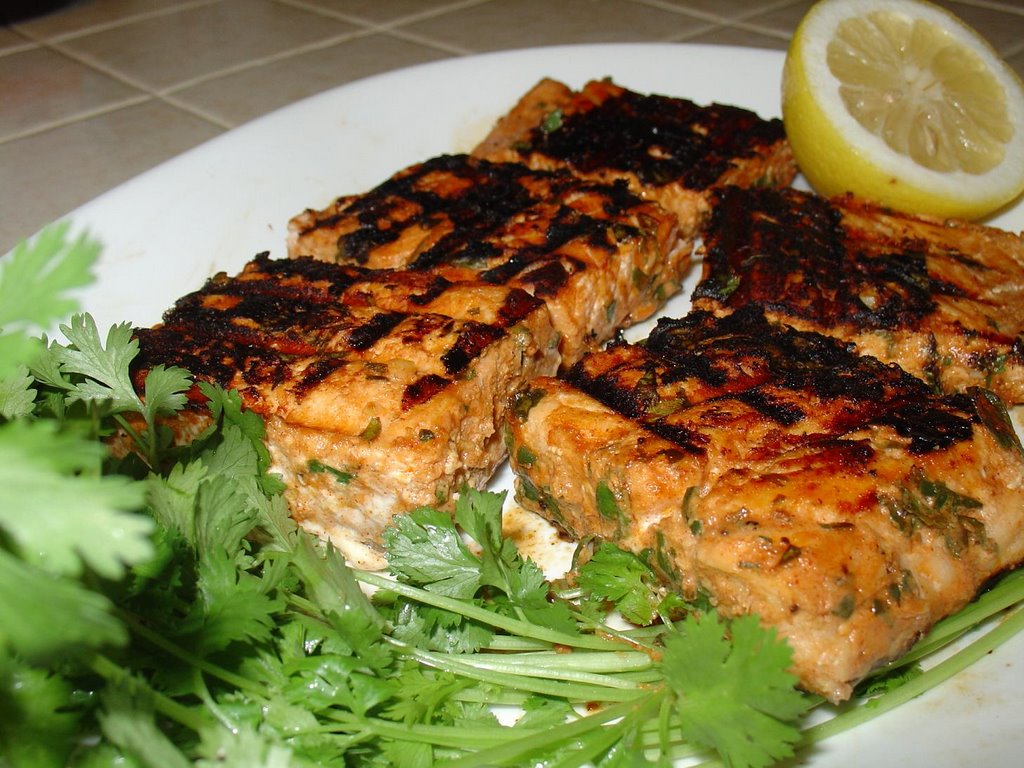
A wonderful way to start off your bean adventure would be to try out Hummus for a snack or as an appetizer. This is best with warm pita bread or any toasted bread. I do not have a photo of this at the moment but would certainly upload it as soon as I take one.

Hummus

4 garlic cloves
2 cups canned chickpeas, drained
1/3 cup tahini (sesame paste)
6 Tablespoons freshly-squeezed lemon juice (2 lemons)
2 Tablespoons water
pinch cumin
1 1/2 teaspoons kosher salt
pinch cayenne pepper

olive oil to drizzle
2 Tablespoon fresh parsley, chopped

1. Combine the chickpeas, tahini, garlic, cumin, water and lemon juice in a food processor; process until smooth. Season with salt and cayenne.

2. Spoon the hummus onto a serving platter and smooth the surface. Drizzle the olive oil over the hummus and garnish with the chopped parsley. Serve with warm pita bread that has been cut into quarters.

*In case you can not find any tahini after you have checked halal markets and indian or any other asian markets, you can substitute it with natural peanut butter. I know that it would be a different entity altogether, but it will be good as well. I just have to think of a name for it.

Do tell me how you enjoy this recipe and its variant.

Monday, November 20, 2006

What's the Catch?


The sporadic posting in this site gives one the impression of a full schedule on the part of the blogger. Whatever the case maybe, I strive to keep things fun and informative. What better venue to experiment on my writing right? Three cheers for blogs. For this posting, I will share with you a recipe utilizing salmon. You can pretty much substitute any fish steaks to your liking. I got this recipe from eating well magazine.

As much as possible, I urge you to use fishes that had been caught through sustainable fishing practice. It just means use farmed fishes or wild caught fishes that are not in threat of extinction. We would not want these yummies disappear forever right?

This recipe is called Grilled Salmon with Chermoula. Chermoula is a North African marinade used mostly in Algerian, Moroccan and Tunisian dishes. It is generally used in seafood, but hey might as well try it with meat and vegetables.

1/4 cup low-fat or nonfat plain yogurt
1/4 cup chopped fresh parsley
1/4 cup chopped fresh cilantro
2 tablespoons lemon juice
1 tablespoon extra-virgin olive oil
3 cloves garlic, minced
1 1/2 teaspoons paprika
1 teaspoon ground cumin
1/4 teaspoon salt, or to taste
Freshly ground pepper to taste
1 pound center-cut salmon fillet, cut into 4 portions
1 lemon, cut into wedges

1.Stir together yogurt,

parsley, cilantro, lemon juice, oil, garlic, paprika, cumin, salt and pepper in a small bowl. Reserve 1/4 cup for sauce; cover and refrigerate. Place salmon fillets in a large sealable plastic bag. Pour in the remaining herb mixture, seal the bag and turn to coat. Refrigerate for 20 to 30 minutes, turning the bag over once.
2. Meanwhile, preheat grill to medium-high.
3. Oil the grill rack. Remove the salmon from the marinade, blotting any excess. Grill the salmon until browned and opaque in the center, 4 to 6 minutes per side. To serve, top each piece with a dollop of the reserved sauce and garnish with lemon wedges.

* Oil the grill rack by wetting a paper towel or impeccably clean cooking rag with oil. Then, with the use of tongs, rub the towel on the grill (make sure that the oil is not dripping from the towel, we do not want any sudden flare ups). Resist the urge to just spray the hot grill with oil. It will most definitely cause a flare up. Singed eyebrows is not a pretty sight, it can be quite painful I might add.

* By chance you do not have the energy to set up your grill, you can use your oven to roast these babies up. You can preheat your oven to 450 degrees Fahrenheit and let it cook away for about 12 to 15 minutes.

* If by an unfortunate circumstance you do not have an oven or it simply does not work, do not fret. You can do this stove top as well. Just get your sauté pan and heat it up to medium high heat and spray it with cooking oil. You can simply follow the cooking time called for in grill cooking.

I can not tell you enough, recipes are just guidelines. Do not be afraid to change things up. That is one of the benefits of cooking. You can make anything to suit your taste.

Thursday, November 09, 2006

Granola Balls

Another way overdue posting. It seemed like I have neglected this place again. Well, let me tell you something about these balls. They were made with lots of estimation. Thankfully, these are flexible morsels. Just follow me through this and you will be able to start enjoying the yummy goodness soon enough.

Start off with equal parts of...
Rolled Oats
Unsweetened Coconut Shavings
Choice of Nuts (or Not)

Choice of Dried Fruit

Canola Oil (or any neutral tasting oil)
Honey (your choice of flavor),up to desired sweetness... you may want to add a tad bit more to make it stick more when forming balls
*Use just enough oil to coat items and won't stick together (don't go oil crazy)

-Preheat oven to 375 deg F
-In a sheet pan,line with wax paper or parchment paper.
Toast together Rolled Oats, Unsweetened Coconut Shavings, and nuts...Oil and Honey
-Stir every 5-10 min. for even browning.
-Once toasted, transfer to a mixing bowl and add in the dried fruits

*to make balls, shape the granola while still hot. Cool completely before transfering to an airtight container.

Enjoy it as a snack or a great breakfast cereal with milk or any other beverage of choice. Feel free to tweak it and make your own concoction. In case you don't have an oven, you can do this stove top using a saute pan for toasting. Tell me how yours turn out.

Friday, September 08, 2006

Wow Brown Cow!

Yet another long overdue posting on my end. I will not bore anyone with the details. I just have to remember the excitement I felt when I received my package of pressure cooker in the mail. It is my very first pressure cooker and I was delighted to get it. As I opened the box for a closer inspection of my toy, recipes to try were racing through my mind. Since I had my mom over I thought of making something I would not eat but has been in our family since I can remember. I am talking about Lengua Estofado. Simply put, it is ox tongue. I don’t even know if I spelled it correctly. It is by far the most requested dish we have on every party. This dish takes a lot of time to prepare. The first leg would be the approximately 3 hours of boiling to make it tender. The next would be the time it takes to peel off the outer lining of the tongue. The power of the pressure cooker will be shaving off most of the time it takes to tenderize the meat. Unfortunately, my mother still had to manually peel off that lining. She was one of my kitchen assistants for the day. Oh well…

Here is the age old recipe I used for this delightful nostalgic dish.

LENGUA ESTOFADO

1 ox tongue

2 calamondin

1/4c soy sauce

1/4c olive oil

5 garlic cloves, minced

2 med onions

1/3c Fresh Tomatoes, chopped (approx. 1 roma)

Salt to taste

1/4t black peppercorns

1/4c white wine

Enough water to cover tongue in the pot

* Salt and vinegar

*Rub tongue with Salt and Vinegar to clean

*Rinse off and boil for approx. 5 min.

*Peel off white layer from the tongue (the taste buds).

*Reserve broth in the pot

*Marinate the tongue in Calamondin and Soy Sauce for an hour. (turning halfway through)

*Reserve marinade.

- Brown tongue in Olive Oil

- Return the tongue in the pot with the reserved broth

- Caramelize onion and garlic using the pan where the tongue was browned

- Add in the tomatoes

- Toss in caramelized onion, garlic and tomatoes with the rest of the ingredients

Plus the reserved marinade into the pot of tongue

- Bring to a boil and simmer for 3 hours (40 min in a pressure cooker with high pressure)

- Strain broth and set aside

- Let the tongue rest for 10 min and slice on a bias then arrange on a platter to be topped off

With the mushroom gravy

MUSHROOM SAUCE

1/4c Butter

1/4c All Purpose Flour

½ c Mushrooms, sliced ( just add more if you love mushrooms)

Reserved Broth

Sauté mushrooms in butter until tender and set aside

Add in AP Flour to butter until golden brown

Add in reserved broth and reduce until it coats the back of a spoon

Put mushrooms back in to heat

Pour some over the platter of tongue and the rest in a gravy container

Another item I made was walnut pie. It is fairly simple to make and one of my mother’s favorite. She’s pretty much crazy for nuts. Well, technically I wasn’t the one who made the pie on that particular day. It was my sister. Kitchen assistant for that day I should say. Thankfully, too many cooks didn’t spoil the broth. A mere almost I would say.

Here is the recipe I used, but I am planning on replacing some of the ingredients for the next bake craze. I would just go straight to the filling part because you can use your favorite pie crust recipe or the ones you can get in your frozen section. I urge you to use good quality ones though. The crust binds the whole delectable pie experience together.

WALNUT PIE FILLING ( I think this is from Sunset Restaurant, Hill Country Tx ; theirs is pecan)

¾ c Sugar

3 Eggs, Large

½ c Light Corn Syrup

3 T Unsalted Butter, melted

2 t Pure Vanilla Extract

1 ¾ c Walnuts, chopped or whole

Preheat oven to 350 deg F

Whisk first 5 ingredients in a bowl to blend

Mix in walnuts

Pour into crust

Bake pie until set approx. 1 hour

Transfer to rack and cool

Too much brown doesn't look quite appealing, but I dare say that it was indeed a delight to the whole eating experience.


Wednesday, August 02, 2006

Create your own pizza fun

Why bother doing this you ask? Control is what I say. Nowadays, with the easy access to everything instatnt, we sacrifice a lot (from quality down to preferences). Once you start making your own pizza, you can only be limited by your imagination. If you think that it will take up too much time and you don't even know if it will turn out good, simply throw that notion out the back door. It's high time to bring out the child in you. The part that would just be so eager to try something new and unknown. Bring out the mad scientist in you. Let's find out where it would take you.

Here is a simple thin crust recipe you could start out with. Give it a go. You might just like it.

Thin Crust Pizza Dough

Serves : 8
Prep. Time : 0:40

.25 oz. pkt. active dry yeast
1/4 tsp. granulated sugar
3/4 cup 110 degree water
1 3/4 cups all-purpose flour
1/2 tsp. salt
sauce, cheese, and toppings of your choice

-Dissolve yeast and sugar in water; allow to rest for 8 minutes.
-In a separate bowl, combine flour and salt.
-Pour yeast mixture over flour mixture and mix well with a heavy spoon.
-Turn dough onto a floured surface and knead for 2 minutes.
-Working from the edges to the center, press dough into a 12" circle.
-Place dough on a lightly greased pizza pan and stretch dough to edges.
-Spread sauce over crust and top with cheese and desired toppings.
-Bake in a 500 degree oven for 8-12 minutes, or until edges are golden.

This is taken from Robbie's Recipe Collection

I made basil, tomato, ham and mozzarella pizza with this recipe. I just drizzled the pizza with olive oil instead of smothering it with sauce. It turned out pretty good if I can say so myself.


Enjoy your own creation and share it with everyone. As you can see, one is taken with a flash and the other without. I think I'll stick with using the flash.


Monday, July 31, 2006

here's a start...

After a long time of neglecting to update, I'm back. What better way to start this off than an introduction to a couple of delicacies I've been snacking on. Namely the Barquiron and Kinihad. These tasty morsels were brought back from the Philippines (in the province of Iloilo) by my aunt.

A barquiron is a combination of barquillos and polvoron, thus the new morphed name. It is basically a polvoron filled barquillo. Barquillos would be a tuile like cookie that is rolled upon itself a few times forming a pipe like shape. It can be enjoyed by itself or partnered with other sweet concoctions like ice cream or hot chocolate for dessert or snack. A polvoron on the other hand is a combination of cake flour, powdered milk, sugar and butter. It has a powder like consistency wherein it got the name. The butter acts as the binder as well when it is packed for shaping.

The barquiron provides a unique mouthfeel experience. You get the delightful crunch from the barquillo as the polvoron explodes in your mouth. As you enjoy the combination in your mouth, the creaminess from the powdered milk and butter plays around your tongue. Washing it down with ice cold milk (may it be dairy or vegan) would be the best way to finish the experience.


A Kinihad on the other hand, is a form of dried bread with a very light hint of anise and sweetness. The texture would be a cross between a cracker and crusty bread. This is usually paired with a nice cup of coffee for snacks. Dip it in the coffee like you would a doughnut would be another way to enjoy this. I think this would also make a very good bread crumb with a couple of pulses in the food processor.


As you can see, a sunglass case could also be used as a stand to prop up specimens. It is always good to have multi tasking items around.

Tuesday, February 14, 2006

Sharp knife anyone?

Last Friday, Feb. 10,2006, I was at a friend's kitchen getting ready to prepare dinner for our little get together. As I was getting things ready, I realized that I am missing a couple of ingredients. My friends were gracious enough to offer to go to the store to grab those stuff. While they were at the store, I just went my merry way in prepping things out. I had peeled and halved my onion. The pasta was happily cooking in the boiling water. I decided to practice my knife skills with the onion. I had the flat side on the cutting board and positioned my knife for the first horizontal slice starting from the bottom. Then it happened. The onion slipped. Great enough I cut my right thumb deeply. It took me a couple of seconds to realize that I also cut a part of my pinkie finger. I immediately elevated my arm and put pressure on my fingers. Looked for my phone and called my friends to tell them I need to go to the hospital. I grabbed a sandwich bag and ice for my severed piece while I was talking on the phone.

My friends came and brought me to the hospital. It took around 20 minutes before a nurse called me for interview on what had happened and get my vitals. It took another 3 or so hours before I got called in to see a doctor to have my thumb stitched up. My pinkie had to be cotorized (spell check this for me will you?) because by that time the severed part had already died. In all, I got 6 stitched on my thumb. I also got a tetanus shot to boot. After being cleaned up and bandaged, I was sent off to get my meds and go home. I had a "hang loose" sign going on with my right hand at the time. The stitches could be taken out after 10 days.

From now on, I will be using those cutting gloves and all slices will be going on a downward direction. All in all, it was a great ER experience. I just have to get past the horrible waiting time. I left a part of me in that hospital literally.